Arabic
 English

Originally posted 2014-04-10 09:29:01.
Logos can be designed in mainly three different ways: text, symbols or a combination of both. In this tutorial we will guide you to design a logo in illustrator by combination both text and symbol. Symbols help to give the company a specific identity. We will show you how to create a symbol and integrate it with the company name to design a logo.
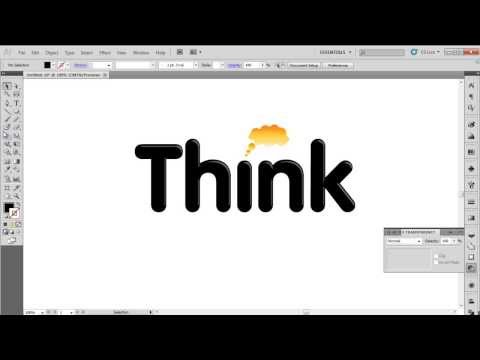
Step# 1 — Add the text
Over here, we will pick up the “type tool” and write the text on the canvas. For this tutorial, let’s write “think” in the text box, changing the font to “Vogue Bold”, keeping the font size to 200 and using black color for the fill.
Now let’s right click on the text box and select the “Create outline” option. This gives us the chance to edit each individual anchor point making up the text.
Step# 2 — Ungroup the text
Next, we will right click on the text once more and select the “ungroup” option. Now that the text is ungrouped, let’s remove the dot from the letter “I” and add a symbol over there. For that, we will select the letter, right click and select the “release compound path” option to ungroup it further.
Step# 3 — Replace the dot with thought cloud
Now we will remove the dot from the letter and make a thought cloud over there using the pen tool. What we will do is create nine half circles, of different proportions, all connected with each other, forming an oval shaped thought cloud. With that done, we will add three more circles below the cloud. After that, we will position the objects in such a way that it looks like the thought cloud is coming from the letter “I”.
Step# 4 — Change the color
Once done, let’s fill the “thought cloud” with a linear gradient. We will set the colors to “f48020” for the right side, “fecb08” for the middle and “fee9a4” for the left side. At the end, we will change the angle of the gradient to 90 degrees.
Step# 5 — Add 3D effect
With that done, let’s make a copy of the “thought cloud”, remove the upper half portion using direct selection tool and change its color to white. Next, we will place the duplicated object over the original though cloud and reduce the opacity to 15%.
Step# 6 — Add highlight
Lastly, we will draw a small highlight inside the thought cloud using the pen tool, like so.
Step# 7 — Emboss the text
Once the thought cloud is ready, select all the alphabets and go to the filter menu. Choose the 3D option and then click on extrude & bevel. Set the settings of the x-axis at -4, y-axis at 0 and z-axis at 0. Change the extrude level to 38, bevel to tall rounded and height to 7 points. Once done, simply click ok to apply and the logo is ready.
Step# 8 — Add shadow
Now for the shadow, we will use the ellipse tool to draw an elongated oval at the bottom of the text. With that done, we will first change its color to black, then go to the filter menu and choose blur option. Over here, we will select Gaussian blur and set the value to 10. Once done, let’s change the opacity of the oval to 35 % and that’s it.
We have successfully made a logo by merging text with a symbol in Adobe Illustrator.